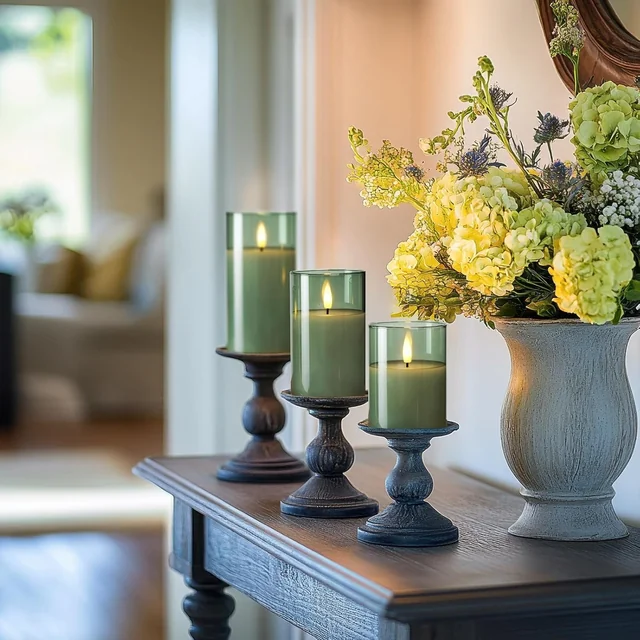
A good candle arrangement starts with a place, not a shopping list. Look at the corner you want to change: perhaps a narrow mantel, the middle of a dining table or two lanterns beside the patio door. Notice the available width, the height of nearby objects and where you will see the light from. Those observations make it much easier to choose a set you will actually enjoy using.
Flameless candles create their glow with LEDs rather than a burning wick. Beyond that shared idea, the details vary. Some have a clear acrylic shell, some put real wax inside glass, and others use resin for outdoor decorating. Controls range from a small switch underneath each light to a remote with brightness settings and repeating timers. This guide helps you work through those differences in a useful order.
Start with your space
Choose the surface before choosing the candle. A broad console can support a group of different heights, while a narrow shelf may be better with a matching pair. A dining table needs enough free space for plates, shared dishes and the people sitting around it. On a bedside table, leave room for the things you reach for every evening. The light should make the space more pleasant without making it awkward to use.
Think about the viewing angle, too. A display against a wall is usually seen from the front, so taller pieces can sit behind shorter ones. A centerpiece is seen from several sides. Walk around the table and check that the arrangement still looks balanced, that the lights are visible and that guests can see one another. A low group of tea lights often suits that job better than a crowded row of tall objects.
Finally, decide whether the candles will stay in place. A permanent shelf arrangement benefits from easy battery access and a convenient timer. An occasional dinner display needs to be simple to bring out, test and put away. For either use, choose a stable surface and leave enough room to reach the base controls without dismantling everything around them.
Choose the candle shape
Pillars are a useful starting point when you want the candles themselves to be part of the decoration. Their wider bodies have a visual presence in daylight as well as after dark. Graduated heights create variation within one finish; a matching pair gives a more symmetrical effect. Compare the actual diameter and height rather than relying on a styled photograph, where nearby objects can make a candle look larger or smaller.
Tea lights work differently. Their small scale makes them useful for repeated accents, compact holders and arrangements with flowers or glass. Pack size matters: a dozen lights can be spread over several small groups, while a larger pack may suit a longer table. Count the holders or positions you intend to fill before ordering. You may need fewer lights than a heavily styled photograph suggests.
Tapers create a slender vertical line. They can add height while leaving more open space around the arrangement, but they need suitable support. Check the base diameter against your candleholder and use any supplied fitting accessories as directed. A taper that leans or sits loosely needs a better fit before it becomes part of a display. Decorative hanging arrangements require their own properly secured installation; the candle set alone does not supply every part of that setup.
Look closely at the finish
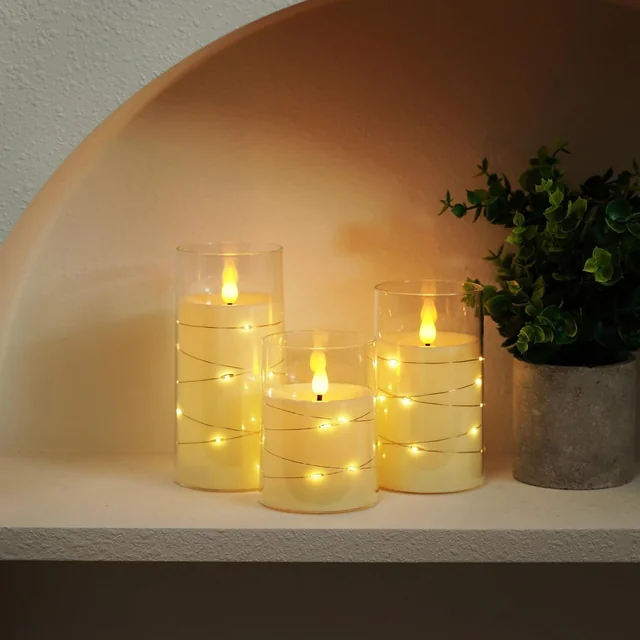
Material affects both appearance and placement. Clear acrylic shells can feel light and contemporary. They let the inner candle shape show through and work with a range of surrounding colors. An amber shell adds a warm tint even while the light is off. Our fairy light pillars add another visual detail: a fine string of small lights inside the shell, beneath the LED flame effect.
Glass-and-wax designs have a different character. The wax gives a familiar candle surface, while the glass adds reflections and a defined edge. White wax in clear glass keeps the palette quiet. Colored glass makes the candle a stronger accent. If your room already contains several finishes, choose one nearby material or color to repeat rather than trying to match every object.
Real wax and glass need appropriate care even though the light is electric. Heat can soften wax, and glass can break. Keep these sets away from active fireplaces and hot windowsills, and handle them gently. For outside spaces, choose a product specifically described for outdoor use. A candle that looks suitable in a lantern photograph is not automatically designed for outdoor weather.
Measure before choosing a holder
A useful measurement is the space the candle actually has to occupy. For a lantern, check the door opening, the internal base and the available height. A candle may fit the base but fail to pass through a narrow door. Decorative supports, raised edges and handles can also reduce the usable space. Measure the narrowest point rather than the outer dimensions of the lantern.
Leave comfortable clearance around the candle. You should be able to place it, remove it and reach its battery compartment without forcing it against glass or metal. Include the raised flame shape when checking the total height. For tea lights, compare both the body width and overall height with the inside of the holder. A compact body does not guarantee that every part sits below a holder’s rim.
When a product description and a dimension diagram use slightly different measurements, use the larger figure for fit planning and check the current offer before buying a tight enclosure. Our six-piece outdoor set, for example, is described with a nominal three-inch diameter while its diagram shows 3.25 inches. That difference matters inside a close-fitting lantern even when it barely changes the look of an open arrangement.
Plan the batteries with the set
Battery planning is easiest before the candles arrive. Note the type, the number required for each candle and whether batteries are included. Then multiply by the number of candles you intend to use. A three-piece pillar set using two AA batteries per candle needs six in total. A twelve-piece taper set using two AA batteries per candle needs twenty-four. Those are different preparations even though both sets use the same battery size.
Do not assume every larger candle takes the same number. Our eight-inch outdoor pillars use three AA batteries each. Other featured pillars use two. Small tea lights may use coin batteries instead, and the remote can have a separate battery requirement of its own. Read the selected product details and the supplied instructions; check the remote as part of your first setup rather than discovering it needs attention after the display is finished.
Follow the polarity marks and close each compartment securely. Avoid mixing battery types or combining old and new batteries. Keep spare and used coin batteries out of reach of children and pets, and keep the product’s battery door properly closed. Decorative candles are not toys. For longer storage, follow the supplied battery-removal guidance and keep the batteries organized by type so the next setup is straightforward.
| Selected set | Batteries per candle | Total for the set |
|---|---|---|
| Fairy Light Pillars, three | 2 AA | 6 AA |
| Large Outdoor Pillar Duo | 3 AA | 6 AA |
| Remote Tapers, twelve | 2 AA | 24 AA |
Understand remotes and timers
A remote is convenient when a candle sits inside a holder or at the back of an arrangement, but remote functions vary. Some only switch the light on and off. Others also change brightness, choose a lighting mode or set a timer. Our featured taper set has an on/off remote. The classic tea lights use individual base switches. The remote-controlled 3D tea lights and featured pillar sets offer timer choices.
A repeating timer helps an everyday arrangement fit into a routine. With a supported two, four, six or eight hour setting, choose the duration that matches the time you want the display lit. Set it when you want the cycle to begin, then check its behavior against the instructions. An occasional dinner and a nightly mantel display may call for different settings. There is no benefit in selecting the longest cycle simply because it is available.
Test the controls before the final arrangement. Put the base switch in the operating position described in the manual, stand near the candles and try the remote with a clear line of sight. Then test from your usual seat. Deep holders and surrounding objects may make control less convenient. If several sets share a room, check how each responds before an event, so you know which lights you can operate together.
Build an everyday arrangement
Start with the largest object and work outward. On a mantel, that might be the tallest pillar or an existing vase. Add the smaller candles where their light stays visible, then stop and look from the doorway. A little space between objects helps each shape read clearly. You do not need to fill every gap; open space is part of the arrangement and makes it easier to dust and reach the controls.
A tray can give a loose group a clear boundary. Check that the tray is stable and large enough for the bases, then keep decorative materials clear of switches and battery doors. If you are using a glass-and-wax set, avoid placing it where afternoon sun or a nearby heat source will make the surface hot. The glow may be electric, but the surrounding materials still determine sensible placement.
Try the lights with the room lighting you normally use. A photograph taken in a dark room can make the effect look stronger than it will beside a bright overhead light. Rather than adding more candles immediately, adjust their position and the surrounding light first. A small group nearer the seating area may create the atmosphere you want more effectively than a larger display across the room.
Plan a table for gathering
Begin with the table in use. Put out the plates, glasses and serving dishes you expect to need, then place the candles in the remaining space. This prevents a lovely centerpiece from becoming an obstacle during dinner. Keep objects stable and leave practical access to shared food. For a longer table, small repeated groups can carry the light along its length without forming a continuous barrier.
Choose a simple relationship between candle color and the rest of the setting. Ivory is an easy companion to linen, pale flowers and clear glass. Black tea lights create a darker outline among metal or smoky glass. Pink and orange can carry a seasonal or celebratory color through several small placements. A few repeated accents usually feel more considered than every object competing for attention.
Test the full arrangement earlier in the day. Confirm that every light works, that the remote reaches the intended positions and that the timer lasts through the gathering. Count actual candles rather than boxes, and keep spare batteries organized nearby. Afterward, turn the lights off or confirm their timer setting before clearing the table, then store them dry with the controls easy to find next time.
Take the light outside thoughtfully
Outdoor decorating starts with a product intended for that use. Our outdoor pillar collection includes resin designs in different sizes and set counts. Compare the scale with your patio table or lantern: a larger pillar can look more balanced inside a large enclosure, while a repeated set of smaller pillars can carry a consistent detail across several positions.
Outdoor suitability is not permission to use a candle in every wet setting. Follow the supplied instructions, keep the candle upright and avoid locations where water collects around the base. Do not use these pillars as floating pool decorations or submerge them. The larger outdoor duo specifically includes a warning against soaking. A covered or sheltered arrangement can also make it easier to keep the products clean and accessible.
Think through how you will collect and store the lights. Choose locations you can reach without moving heavy furniture, check the condition of the battery covers and bring the candles in when their instructions or local conditions call for it. Before the next use, look for dirt or moisture around the base and confirm that the controls still work. Outdoor styling is easier when routine care is part of the plan.
Read photographs and set counts together
Product photographs serve several purposes. A plain product view helps you see the shape and finish. A dimension image helps with scale. A styled scene shows an arrangement you might adapt. These images are useful together, but a styled table can include extra candles, holders, flowers and other accessories that are not part of the selected offer.
Use the written included-items list as your starting point. Check the number of candles, the selected color, the size combination and the controls supplied. If the arrangement you like uses more pieces than one set contains, calculate how many sets you would need before ordering. For a matching pair, also check whether the candles are the same height or graduated sizes.
Open the larger photographs when details matter. Look at the base, the finish and the dimension diagram, then compare those details with the written specifications. Screens and room lighting can shift the appearance of a color, so treat the photographs as a useful guide rather than an exact paint sample. If holder fit is critical, prioritize measurements over the impression of scale in a room scene.
Make care and storage easy
Allow a little room for maintenance when you arrange the candles. You will eventually need to reach a battery door, move a light for cleaning or check a control. Keep the supplied instructions together with the remote, and consider labeling the storage box with the product name and required battery type. A small amount of organization saves time when several similar sets come out for a seasonal display.
Handle glass gently and keep wax away from heat. Follow the product’s cleaning instructions instead of soaking a candle or spraying liquid near its electrical parts. Store candles in a dry place where the raised flame shapes and switches will not be pressed or bent by heavier objects. Separate loose accessories so they do not scratch the finish while the box is moved.
Before reusing a stored set, inspect it and test every light. Check battery compartments and replace batteries as instructed. Keep used batteries separate from fresh ones and follow local disposal guidance. If a candle or compartment is damaged, resolve that issue before putting it back into an arrangement. A short check is easier before the table is dressed or the lantern is in position.
Your final five-minute check
Before choosing a set, write down the place, the usable dimensions and the number of lights you need. Then check the finish and intended indoor or outdoor use. Confirm the battery requirements and decide whether individual switches, a basic remote or a timer best suits how you will use the candles. This keeps the choice tied to your space rather than to a photograph alone.
- Measure the holder opening, interior width and available height.
- Confirm the selected color, candle count and size combination.
- Read the included-items list for remotes, batteries and accessories.
- Check the controls and timer functions for that exact set.
- Plan a stable location and an easy way to reach the battery doors.
- Review the final price, availability and delivery estimate before ordering.
Once the set arrives, test it before styling. Then begin simply: one surface, a little breathing room and enough light to make the evening feel different. You can always move the candles, change the surrounding colors or try another arrangement. The useful details give you a sound starting point; the atmosphere is yours to make.